
Have you ever had moments where you think "for heaven's sake, WHY haven't I been doing this all along?" Or "I never knew how this tiny little thing could change.my.life?"
I've had THREE of those moments lately - yes three. It's funny how little tips or ideas can change the way you quilt. What's even better than me realizing these things? I'm going to share these ideas with you! You don't have to thank me...I'm just a giver ;)
Ok, after typing out the post I realized I got quite garrulous...so, feel free to skip the dribble and just pay attention to the three Lessons Learned in the post. It'll save you time (but you may not laugh as much). You've been warned.
First - A conversation in one of my Flickr groups gave me the idea to clear off the clutter-filled side of my sewing table and put my 18x24" cutting mat there. I can't believe it took me so long to figure out that the spot was even big enough for my cutting mat! It was (and at times still is) the problem area that is a fabric magnet, notions dumping ground, pile o' schtuff spot. I cleaned it up and voila - instant, magical cutting space. You would be sad to know that before this I was hauling everything I needed to cut upstairs to my dining room table or living room floor b/c I didn't think I had a big enough surface on which to cut fabric. Little did I know that I DID have the space...it was just buried under the heap of fabric that I try to promise myself I'm going to fold and put away as soon as I cut it but never do. I still schlep my stuff upstairs if I'm doing a lot of cutting at once or if I'm cutting large pieces of fabric (my 24x36" cutting mat tucks right behind my piano in the dining room!). I may not be getting as much exercise bounding up and down the stairs every time I need to cut something, but I sure am a happy little camper down in my laundry room "studio" cutting away, all pleased with myself.
Lesson learned: have a dedicated spot for even a small cutting mat near your sewing machine if at all possible. Saves so much time!
Second - Just like the miles of staircases I've climbed to cut my fabric, so too was I getting a workout to iron everything. My laundry room is technically big enough to set up the ironing board, but it's kind of awkward and I still had to get up every time I wanted to press open a seam. Gosh that makes me sound lazy! Most of the time I would set it all up in the living room (more space) and trek back and forth to press stuff. Imagine how many times I'd be up and down just to complete one block! My thighs may have thanked me, but I sure was wasting a lot of precious sewing time. I don't get a lot of sewing time with the circus that is having three energetic boys going on around me, so maximizing my "machine time" is critical. How did I remedy this, you ask? Simple. A pressing table made from a TV tray! I cannot take credit for this idea (remember, I'm an idea stealer borrower, NOT idea maker) - Elizabeth over at Oh, Fransson! is the girl-genius that devised this fabulous number. It was kismet that this project came to be in my home. My mom had gifted us her set of tv trays a few years back, which we thought would come in so handy. Um, they ended up being excellent dust collectors in our storage room. We were cleaning out a few months ago and decided to donate the tv trays. I'd just stumbled upon Elizabeth's tutorial about the pressing table and figured it was meant to be. I snagged one of those puppies and turned it into a fab table the very next day and I haven't looked back! It sits right next to me when I sew. I just have to swivel my chair to press all of those pretty little seams. I can finish a whole block without getting up (again with the LAZY)! How awesome is that and why can't I be that clever??
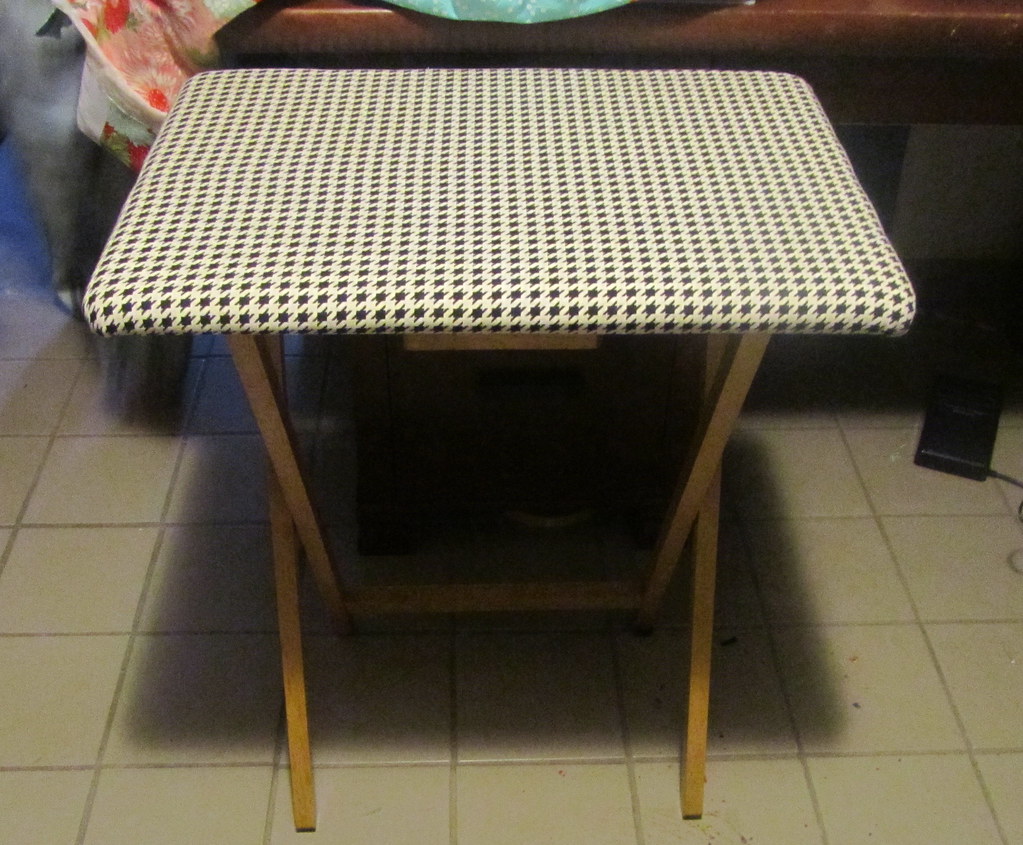
Lesson learned: Oh Fransson's! TV Tray Pressing Table is pure genius and everyone needs to make one ASAP!
Third - I kind of stumbled on this myself, but it was pure coincidence. I'd wanted a 12.5" square ruler for quite a while so that I could easily square up swap blocks. I had a 50% off coupon for JoAnn a couple of weeks ago and decided to get one. As I was deciding which one to get (who knew there'd be like 3 or 4 different 12.5" square rulers to choose from...how can they possibly be different from one another?), I happened upon a 4 pack of square rulers. Surely 4 is better than one, right? Of course it is, especially if I can save 50%! To be honest, I didn't even really look at what sizes the other rulers were. Onto a shelf in my studio the package went. Then, the other day I was cutting 80-something HSTs for the 3x6 bee and not really looking forward to trimming them all. For the record, I love-ity love HSTs, but the trimming is so tedious! I was poking around for the 12.5" ruler for when I managed to get all of those buggers sewn into blocks when I found the little 4.5" square ruler. Hello, sunshine! I'm not going to lie and tell you that this baby trims the HSTs for you, but that little ruler sure makes it a helluva lot easier! I'd been using the 45 degree angle line on my cutting mat and my big 6x24" ruler to trim them in the past. I had no idea how hard I was making it! I might just start carrying the little square ruler around with me in case anything else needs a quick trim...LOVE that thing. All of my HSTs are trimmed and ready to be sewn...I just love how those 2 pretty little triangles make a perfect square. Sometimes it's just the little things.

Lesson Learned: Use a little square ruler to trim HSTs! Or, on a more general note, use the best tool for the job. You'll thank yourself (and that cute ruler!).
Have I blabbered on long enough? Me thinks. I just have one little request if you've made it this far...share one (or more!) thing you do/use that makes your sewing life easier. I'd love to hear everyone's suggestions!
Love your post, Deb. I think my "schtuff" wish list just got a wee bit longer... I tell you what. I honestly cannot feel like I cannot sew properly without my little sewing apron. When I first started sewing regularly, I was always looking around for my smaller square ruler, tiny rotary cutter, fabric marker, etc. I picked up a cheap-o at the craft store and added my goodies to it. It's not bulky by any means, and when I have multiple stations and am quite mobile, I can have my little utinsils in my hand in a matter of seconds. Plus, I look fabulous whilst walking outside to get the mail.
ReplyDeleteI also tend to end up with a mountain of notions at one end of my sewing table. I clear it off to quilt & then it goes right back! I recently added a small cutting mat there too & I use it mostly just for trimming HST's (with a 6"sq ruler!)- very handy!
ReplyDeleteI have that tv table idea filed away for when I finally buy a teeny tiny iron to use on it :)
One thing I do is keep my zippers in an old tea box that has dividers. I used to keep them in a box, all mixed up & rainbow-y. When I started to make more things with zips, I decided that I should have them sorted by length & I find it so much easier to find what I need now. That's all I got!
I will be checking back in for other tips though...
Great post, Deb! I'm definitely going to be making that TV tray ironing board - I need something that can be folded up. Two things I can't sew without now are 1) one of those plastic organizer drawer chests beside my sewing table. The top drawer has my pin cushion, small scissors, extra feet, thread, machingers, etc. I just open that drawer when I'm ready to sew and then close it when I'm done so it doesn't tempt little fingers. I also have a basket by my cutting board that has a pin magnet and my rotary cutter. The basket catches any pins that miss the magnet, the rotary cutter is out of sight and it looks great. Cheers, M-R
ReplyDeleteOh, my favourite recent discovery though is Bonnie Hunter's leaders/Enders technique where you basically piece another quilt top while you are working on your current project. Love this technique!
ReplyDelete